 Call 239-332-2750
Southwest Florida pipe specialists · Since 1980
Trenchless Pipe Lining
Restore suitable damaged sewer and cast-iron lines with UV cured CIPP. We inspect and prepare the existing pipe before recommending a liner, and verify the finished work by camera.
Installing liners since 2005
Over 20 years of expert pipelining experience.
The Plumber’s Plumber has been installing sewer pipe liners under homes and businesses in Fort Myers, Cape Coral, Naples, and across Southwest Florida since 2005. These videos give you a look inside the pipes we work on and the experience behind our pipelining procedure.
Our process starts with a camera inspection to evaluate the pipe, followed by thorough cleaning and preparation. When lining is suitable, we install and cure the liner, then inspect the finished work by camera. Equipment and materials have advanced over the years; careful preparation and attention to detail remain at the heart of our work.
Inside the pipe · The inversion process
How we turn a flexible liner into a new pipe within your pipe.
The rounded end you see moving toward the camera is the advancing fold of the liner. Inversion means turning the liner inside out as it enters the existing pipe—much like turning a sock inside out. The liner unfolds at its leading end and lays against the pipe wall as it advances.
- Inspect and prepare. We camera-inspect the drain, assess whether lining is suitable, and clean away roots, scale and deposits as needed. Measurements and the pipe’s condition guide the liner selection and installation plan.
- Prepare the liner. A flexible tubular liner is saturated with the specified resin and passed through calibration rollers to distribute it evenly. The prepared liner is loaded into the inversion equipment, with its starting end secured at the outlet.
- Invert it into position. Controlled air pressure turns the liner inside out and advances it through the prepared pipe. As the liner turns, its resin-saturated surface faces the existing pipe wall. The crew controls its progress to reach the planned end point.
- Hold and cure. Pressure keeps the liner expanded against the pipe while the resin hardens. The curing method depends on the liner and resin system: compatible systems may use light, heat or an ambient cure. Inversion places the liner; curing is the separate step that hardens it.
- Finish and verify. Once curing is complete, we remove temporary installation equipment, trim the ends and reopen covered branch connections where required. A final camera inspection checks the completed lining before the drain is returned to service.
The result is a continuous cured-in-place pipe lining formed inside the existing drain, with less excavation when the pipe is a suitable candidate. Lining follows the existing pipe’s route; it does not correct a belly or restore a collapsed pipe.
Process reference: BRAWO SYSTEMS installation instructions. The exact installation and cure follow the specifications of the selected system.
Tap any video to play. Videos start muted; use the player controls for sound.
Cast-iron pipe restoration · Actual installation
Watch a liner being guided into place.
See the installation from inside the pipe as it happens. Our crew uses specialized techniques to direct the liner into the intended section of the sewer drain. This is the precision behind restoring a pipe from within.
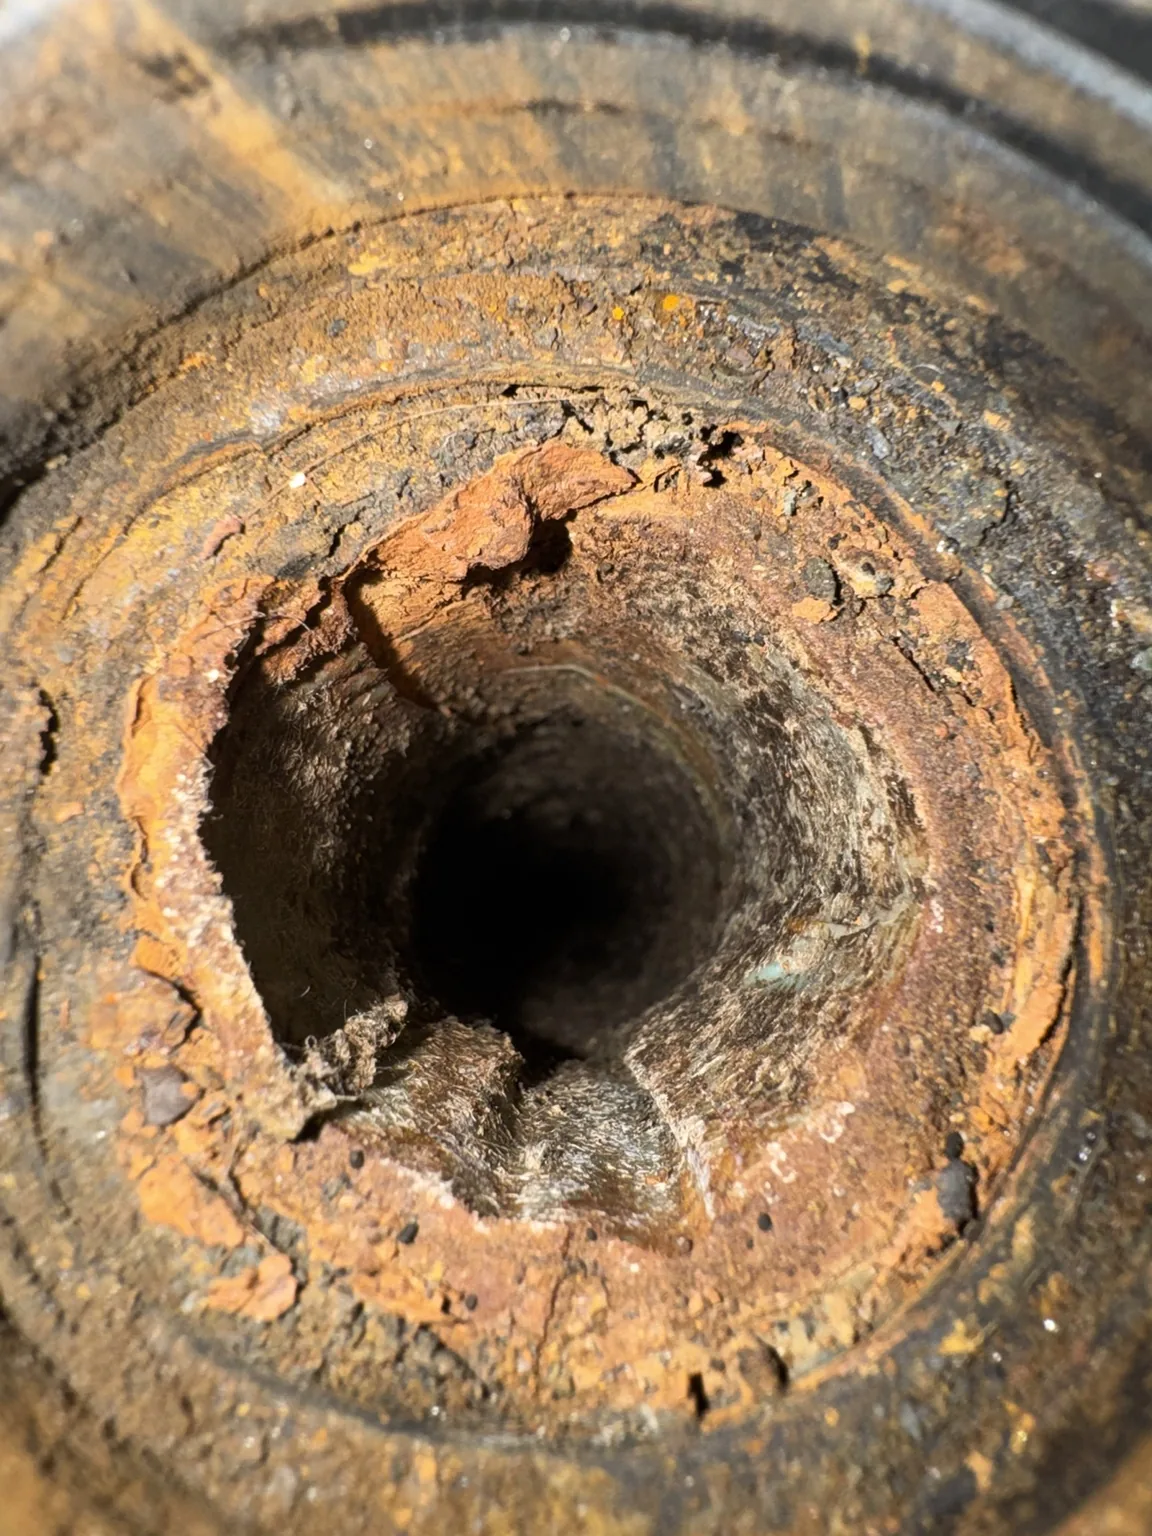
See the problem
What failing cast iron can look like
Heavy rust, rough scale, and deterioration can restrict flow and contribute to recurring drain problems. This close-up shows why the condition of the pipe matters.
We inspect and clean the line before recommending lining, targeted replacement, or another appropriate solution.
Tell us about your pipesOur equipment. Our process.
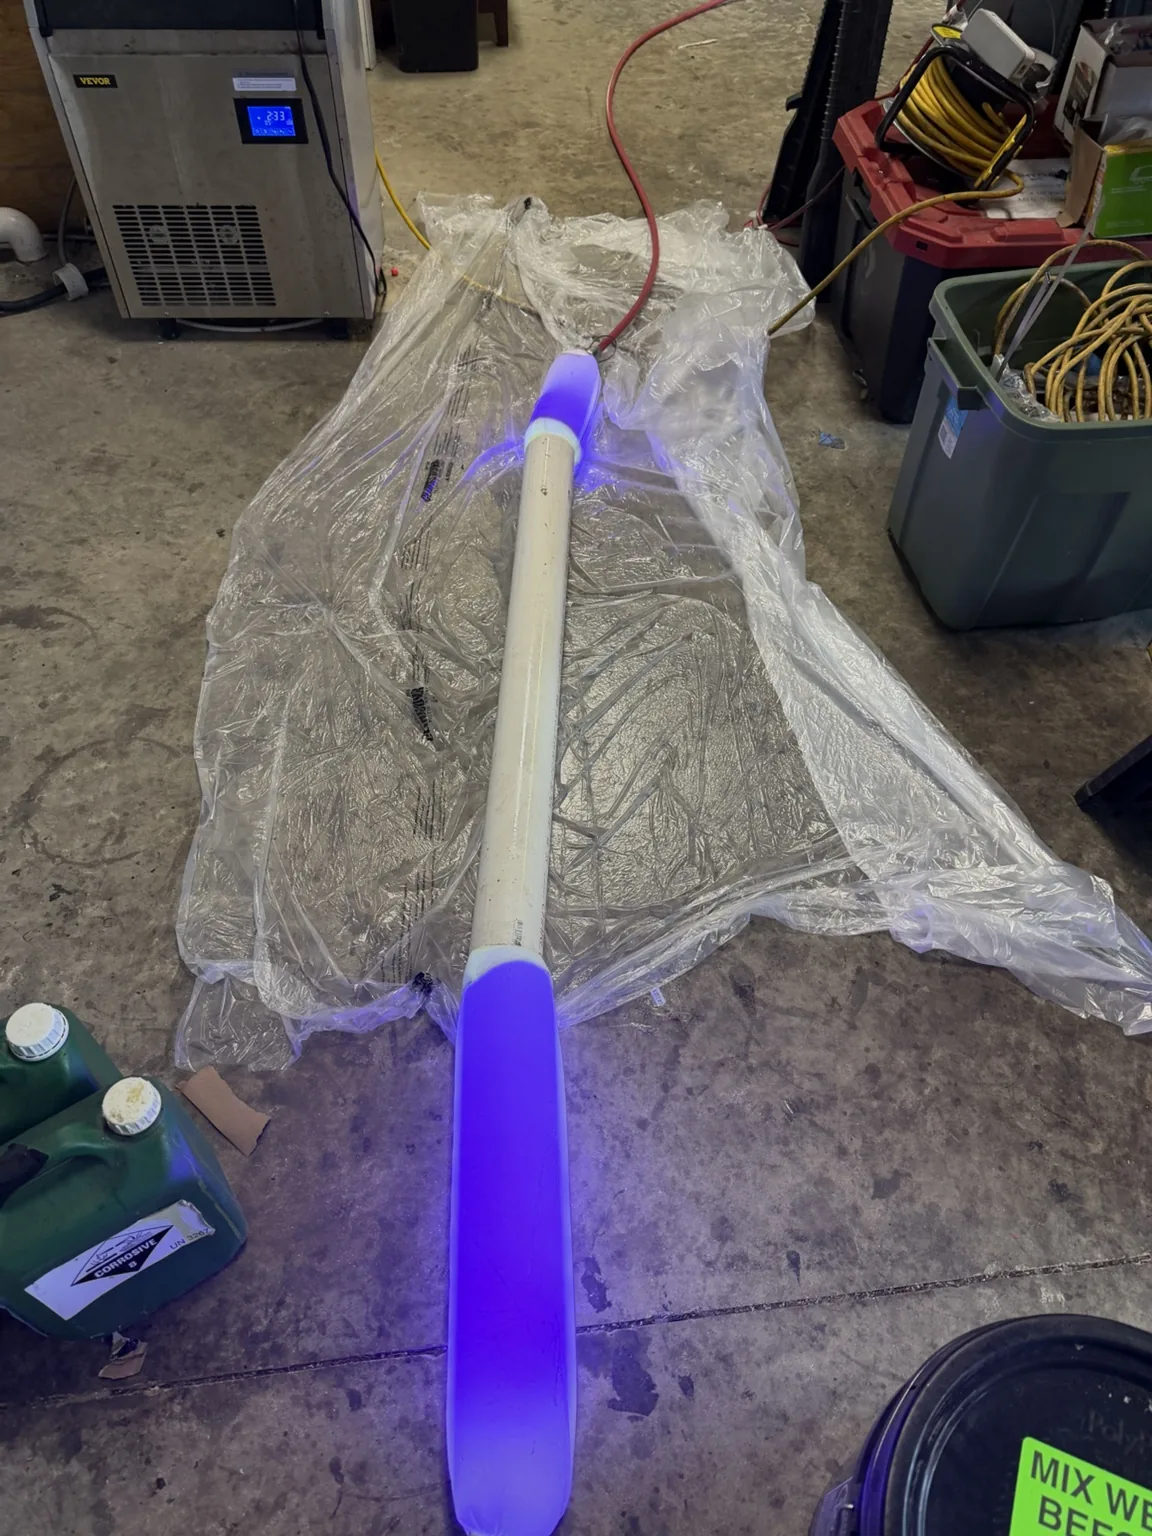
Raising the Bar With Our Liners
A closer look at our UV liner curing process in the shop. UV light cures a compatible resin-saturated liner into a hardened pipe lining. On each job, pipe preparation, the right system, and a final camera inspection are all part of the process.
Real work. Years later.
What does a liner look like after more than 15 years in the ground?
Take a look at this liner in our field video.
THE PLUMBER’S PLUMBER · HOW IT WORKS
Big pipe problems.
Simple explanations.
Take a look underground. Follow the steps to see what our equipment does—and why it matters.
A new pipe inside the old one
Trenchless pipe lining
See how a prepared pipe can be restored from the inside with cured-in-place pipe (CIPP).
UV curing is illustrated. Ambient-cure systems use a different curing process. Access and suitability vary. An on-site assessment determines the right method for your property.
When to call
Common signs
- Recurring backups in an older drain
- Corroded cast iron under a slab
- A damaged line beneath a driveway or finished area
How we work
From diagnosis to verification
- Camera inspect and locate the line
- Descale and clean the pipe
- Choose a liner or targeted repair based on the condition
- Install and camera verify the finished work
Get a clear starting point.
Every pipe is different. Tell us what is happening and our team will recommend the appropriate next step after evaluating the site.
Start the plumbing diagnostic